Claim Your Free Design Consultation Today
Your Essential Roadmap to Success
Master Every Step to Pour a Professional Concrete Walkway
Build a Lasting Path With Proper Technique
Site Assessment and Material Preparation
Before any concrete touches the ground, a thorough site evaluation sets the foundation for success. Walk the proposed path multiple times, noting the natural terrain and drainage patterns. In Beverly and surrounding Massachusetts communities, the freeze-thaw cycles from late autumn through early spring can be particularly harsh on poorly prepared walkways. Water that pools or seeps beneath concrete will expand when temperatures drop, causing cracks and heaving that undermine even the best pouring technique.
Begin by marking the walkway boundaries with stakes and string line, maintaining a width of at least 36 inches for comfortable two-person passage. Measure the total length and multiply by the width, then multiply by the depth (typically 4 inches for residential walkways) to calculate cubic footage. Divide by 27 to convert to cubic yards. For a 20-foot by 3-foot walkway at 4 inches deep, you will need approximately 0.75 cubic yards of concrete. Always order 10 percent extra to account for spillage and slight variations in base depth.
Gather your materials well in advance. You will need bags of premixed concrete (eighty-pound bags yield roughly 0.6 cubic feet each), gravel or crushed stone for the base layer, sand for leveling, wooden stakes, two-by-four lumber for forms, duplex nails for easy removal, a level, a square-edged shovel, a wheelbarrow, a concrete mixing tub or power mixer, a screed board, a bull float, an edging tool, a jointing tool, and a stiff-bristle broom for texture. Consider renting a plate compactor if your project exceeds 50 square feet, as hand tamping rarely achieves the density needed to prevent settling.
Check local frost depth requirements. Massachusetts typically mandates at least 4 inches of compacted aggregate base to mitigate frost heave, though some masonry contractors recommend 6 inches in areas with poor drainage. Verify whether your municipality requires a building permit for walkways; most residential paths under 30 inches in height do not, but regulations vary by jurisdiction.
Excavation and Base Preparation
Proper excavation determines whether your walkway remains level for decades or begins to sink within a few seasons. Remove all grass, roots, and organic matter within your marked boundaries, digging to a depth that accommodates both the base layer and the concrete slab. For a standard 4-inch concrete thickness over a 4-inch gravel base, excavate 8 inches below the desired finished surface height. Use the edge of your shovel to create clean, vertical sides along the trench perimeter.
The Massachusetts coastal climate brings a unique challenge: our clay-rich soils retain moisture and expand during wet periods, then contract during dry spells. This movement can destabilize concrete if the base is not properly engineered. After excavation, inspect the subgrade for soft or spongy spots. If you encounter loose fill or organic layers, dig deeper and replace with compacted gravel. A walkway contractor can assess soil conditions if you are uncertain about stability.
Pour your gravel base in two-inch lifts, compacting each layer thoroughly before adding the next. Three-quarter-inch crushed stone works better than rounded pea gravel because the angular edges lock together under compaction. Spread each lift evenly with a rake, then make multiple passes with your plate compactor, overlapping each pass by several inches. The surface should feel firm underfoot with no visible movement when you walk across it. Check for level frequently, adjusting high and low spots before compaction. A slight crown in the center (about one-quarter inch per foot of width) encourages water to sheet off the edges rather than pooling.
Once the base is compacted, add a one-inch layer of coarse sand and screed it smooth with a straight two-by-four. This bedding layer fills small voids and provides a uniform surface for the concrete. Mist the sand lightly if it is dry and dusty, but avoid saturating it. The goal is to stabilize fine particles, not create mud. Many homeowners working on landscaping projects will tackle the base themselves but bring in professionals for the concrete work. If you choose to continue, ensure your base passes a simple test: when you press your thumb firmly into the sand, it should leave only a faint impression, not a deep crater.
Forming and Layout
Formwork transforms a rough excavation into a precise mold that defines your walkway’s dimensions and finished appearance. Select straight two-by-four lumber without significant warps or twists. Pine is economical and adequate for a single pour, while cedar or treated lumber justifies the extra cost if you plan to reuse the forms for future projects. Cut boards to match your walkway length, allowing a few extra inches at each end for staking.
Position the first form board along one edge of your excavation, with the top edge at your desired finished height. Drive wooden stakes every three feet along the outside face, keeping them flush with or slightly below the board top to avoid interference when screeding. Use duplex nails (double-headed nails) to fasten the board to the stakes. These nails allow easy form removal after the concrete cures. Check for level along the length, adjusting stakes as needed. For proper drainage, establish a one-eighth-inch drop per linear foot away from any structures.
Install the opposite form board, measuring frequently to maintain consistent width. Use a framing square at several points to ensure the sides form 90-degree angles if your walkway includes corners. If your path curves, use flexible composite bender board or kerfed (saw-cut) lumber to create smooth arcs. Secure curves with stakes every 18 inches to prevent bulging under concrete pressure.
In New England, seasonal ground movement makes form stability critical. The spring thaw often leaves soil soft and workable, an ideal window for pouring, but stakes driven into saturated ground may shift. Test each stake by pushing against the form; if it moves more than a quarter-inch, add additional stakes or cross-bracing. Some homeowners consulting with a patio builder will learn that professional crews often stake every two feet in marginal soil conditions.
Before mixing concrete, coat the inside faces of your forms with vegetable oil or commercial form release agent. This prevents the concrete from bonding to the wood and makes form removal effortless. Set control joints (also called contraction joints) at intervals no greater than 10 feet by installing temporary dividers or planning to cut grooves within 24 hours of pouring. These joints allow the concrete to crack in predetermined locations rather than randomly across the surface.
Mixing and Pouring Concrete
Timing is everything when working with concrete. Plan your pour for a day with mild temperatures between 50 and 80 degrees Fahrenheit, avoiding extreme heat or the threat of overnight frost. Beverly’s coastal humidity can extend working time slightly compared to drier climates, but you still have only about 90 minutes from initial mixing to final finishing before the concrete becomes unworkable. Recruit at least one helper for projects over 50 square feet; trying to mix, pour, and finish alone often results in rushed work and imperfections.
For smaller walkways, premixed bags offer convenience and consistency. Pour the dry mix into a wheelbarrow or mixing tub, creating a shallow crater in the center. Add water gradually according to package directions, mixing with a hoe or mortar hoe using a folding motion that brings dry material from the edges into the center. The correct consistency resembles thick oatmeal. It should flow slightly but hold its shape when you make a trough with your hoe. Too much water weakens the concrete and increases shrinkage cracking; too little makes placement and finishing nearly impossible. Many professionals working on concrete walkway installation projects rely on ready-mix trucks for jobs requiring more than one cubic yard, ensuring uniform quality and faster placement.
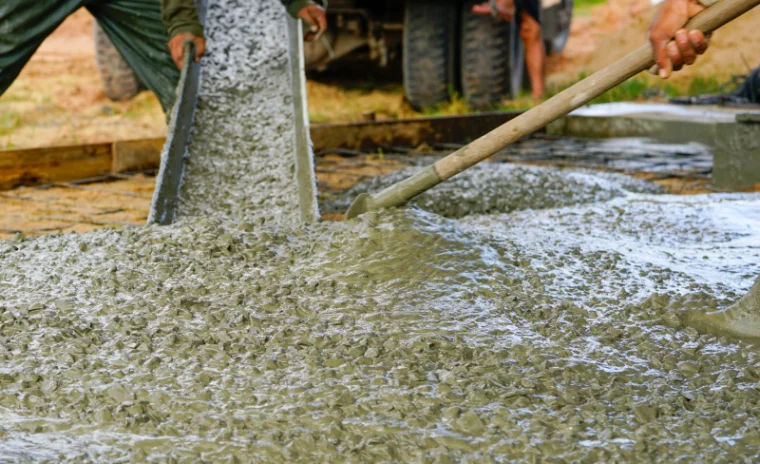
Begin pouring at the farthest point from your concrete source, working backward so you do not have to walk through fresh material. Dump concrete directly into the forms, spreading it roughly with a shovel to fill the space evenly. Overfill slightly, as you will screed off the excess. Use a shovel or rake to work the mix into corners and against form edges, eliminating air pockets. Tap the outside of the forms with a hammer to vibrate the concrete and bring any trapped air to the surface.
Screed the surface by placing a straight two-by-four across the forms and pulling it toward you with a sawing motion. This levels the concrete and reveals low spots. Add more concrete to depressions and screed again until the surface is uniform. Immediately after screeding, use a bull float (a large, flat trowel on a long handle) to smooth out screed marks and bring a thin layer of cream (the fine particles and water) to the surface. Push the float away with the leading edge slightly raised, then pull it back flat. Work systematically across the entire slab, overlapping each pass slightly.
Watch for bleed water (a thin, shiny layer of water) rising to the surface after floating. Do not proceed with additional finishing until this water evaporates or is carefully removed by dragging a rubber squeegee across the surface. Finishing over bleed water traps it beneath the surface layer, creating a weak, dusty finish prone to flaking.
Curing and Final Finishing
Finishing transforms raw concrete into a functional walking surface with the right texture and appearance. Once bleed water disappears and the surface can support light finger pressure without leaving a deep impression (typically 30 to 90 minutes after pouring), begin edging. Run an edging tool along the perimeter between the concrete and forms, using smooth, sweeping strokes that create a slightly rounded edge. This prevents chipping and gives the walkway a professional appearance. Follow with a jointing tool to cut control joints at your predetermined intervals, pressing firmly to create grooves at least one-quarter the slab depth.
For slip resistance, apply a broom finish before the concrete fully hardens. Drag a stiff-bristle broom across the surface perpendicular to the walkway length, creating fine grooves that provide traction even when wet. Light pressure yields a subtle texture suitable for areas protected by overhangs, while firmer pressure creates deeper grooves better suited to exposed walkways that collect rain or snow. In coastal Massachusetts, where autumn rains and winter ice are predictable, a medium-to-coarse broom finish offers the best balance between aesthetics and safety. Some homeowners working with a retaining wall contractor or stone step installation specialist will coordinate finishes across multiple hardscape elements to create visual continuity.
Curing is the most overlooked yet most critical phase of concrete work. Concrete gains strength through a chemical reaction that requires consistent moisture over several days. If the surface dries too quickly, especially during warm or windy weather, the concrete will not reach full strength and may develop surface crazing (a network of fine cracks). As soon as the broom finish is complete and the surface is firm enough to resist marring, cover the walkway with plastic sheeting, burlap, or curing blankets. Keep the covering in place for at least three days, lifting it daily to mist the surface with water if you are using burlap.
Remove forms after 24 to 48 hours, when the concrete is hard enough to resist edge damage but green enough that nails pull free without breaking chunks from the slab. Fill any voids along the edges with a concrete patching compound, smoothing with a trowel to match the existing finish. Continue moist curing for a full seven days for maximum strength and durability. Foot traffic can resume after three to five days, but keep vehicles and heavy equipment off the walkway for at least one week.
Long-term maintenance begins with proper curing. A well-cured walkway in Beverly will withstand decades of freeze-thaw cycles with minimal cracking. Apply a penetrating concrete sealer after 28 days of curing to protect against moisture infiltration and salt damage from winter deicing. Reapply sealer every two to three years, or more frequently if you notice water absorption rather than beading on the surface. Address small cracks promptly with flexible concrete caulk to prevent water intrusion and progressive deterioration. While many homeowners succeed with DIY concrete projects, those seeking guarantee of longevity often turn to a masonry contractor for installation, knowing that professional technique and proper curing protocols translate to walkways that serve reliably for 30 years or more.